CAD (Computer-Aided Design)
In the second week of fab Academy, we learned about the 2D and 3D design and the software used in drawing are
 |
 |
 |
 |
| Autocad | Fusion | inkscape | TINKERCAD |
2D design
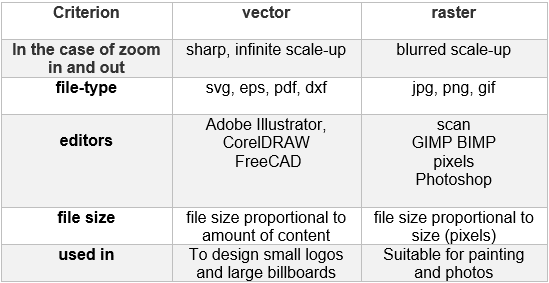
The difference between Vector and Raster are
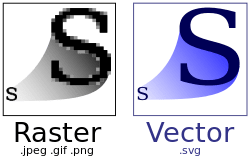
vector vs Raster Images The design either contains Vector or Raster images, or both, and these patterns are used according to the designer's need and the work required .
Raster Most of the images you see on the Internet depend on the Raster style, such as photographs, they consist of a large group of "Pixels" and the quality of the image depends on the number of pixels, the higher the number, the higher the image quality.
Vector Unlike Raster images, Vector's images do not consist of points or pixels, but rather of lines that have a starting and ending points side by side, the path may be a line, a square, a triangle or a curved shape
Raster disadvantages:
- Raster mode needs to store a lot of information, so large images need a lot of storage space in order to save them.
- The Raster image can be minimized without losing its quality, but the problem occurs when the image is enlarged, as it appears blurry.
Vector's disadvantages:
- They are not too suitable for encoding videos or pictures from the real world. They do support mixed compositions, though.
- The data used for describing them needs to be processed by powerful machines. If the volume of data is high, it slows down image rendering even if the files are small in size.
- One more disadvantage is that even the smallest of errors in the drawings are visible when you enlarge images to an extent. These incidents can affect image quality, especially when used in animation.
Raster features:
- Raster is used in designs that require the use of photographs.
- Raster is used when adding some frills and effects to pictures.
Vector's features:
- Because Vector's images do not consist of a certain number of points, they can be enlarged to a large size without losing the image quality, and the boundaries of the design will remain clear and clear.
- Vector technology is ideal for logo design, which may be too small to fit a business card, or too big to fit a large billboard.
Getting Started with AutoCAD
AutoCAD is basically a CAD(Computer Aided Drawing/Drafting) application software developed by Autodesk inc., pioneers in the 2D & 3D drafting Engineering software. The most commonly used application of theirs is AutoCAD and it is available in different shades for different fields of engineering.
Benefits of AutoCAD
Well, there are a lot of reasons for you to use AutoCAD, a few are listed below:- Improved design productivity.
- Engineering personnel requirement.
- Any modifications are easy to make.
- Design accuracy is more.
- Hidden details of components can be revealed.
- Dynamic viewing and zooming.
- Cost of errors are reduced.
- Efficient design is obtained.
- Quality drawing.
- Standards are maintained.
- Easily imported and exported
Now, we will get to know the main AutoCAD interface parts:
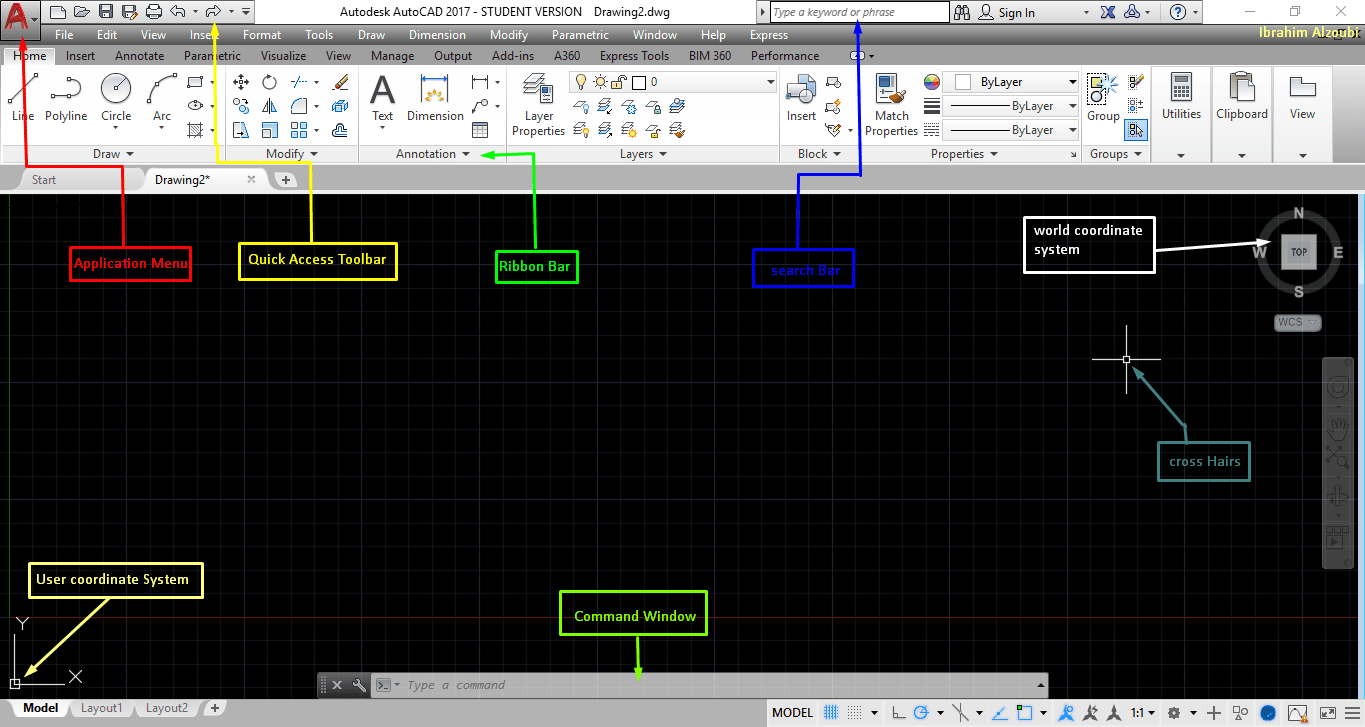
To explain the various parts of the AutoCAD screen editor, we will divide it into 4 areas:
- Drawing Area
- Menu Area
- Command Area
- Status Area
Drawing Area
The drawing area is the area where the drawings are created and occupies 80% of the window space. When the mouse is moved across the screen, we would see two crossed lines across the screen. This is the drawing editor cursor. The cursor is used to select and draw.
Menu Area
The menu area is the area that we see on the top of the screen, and we could select the commands from here. This is quite easy as the options are in written format and in icon formats.
Command Area
The command area is the area that we could find below the drawing window and it is a very important area where the commands used in AutoCAD are entered through keyboard. Here, we can use AutoCAD prompts for necessary informations to complete the command.
Status Area
The status area is the bottom-most area in the window, found below the command area. This is used for displaying current status informations regarding the work done on the Drawing area.
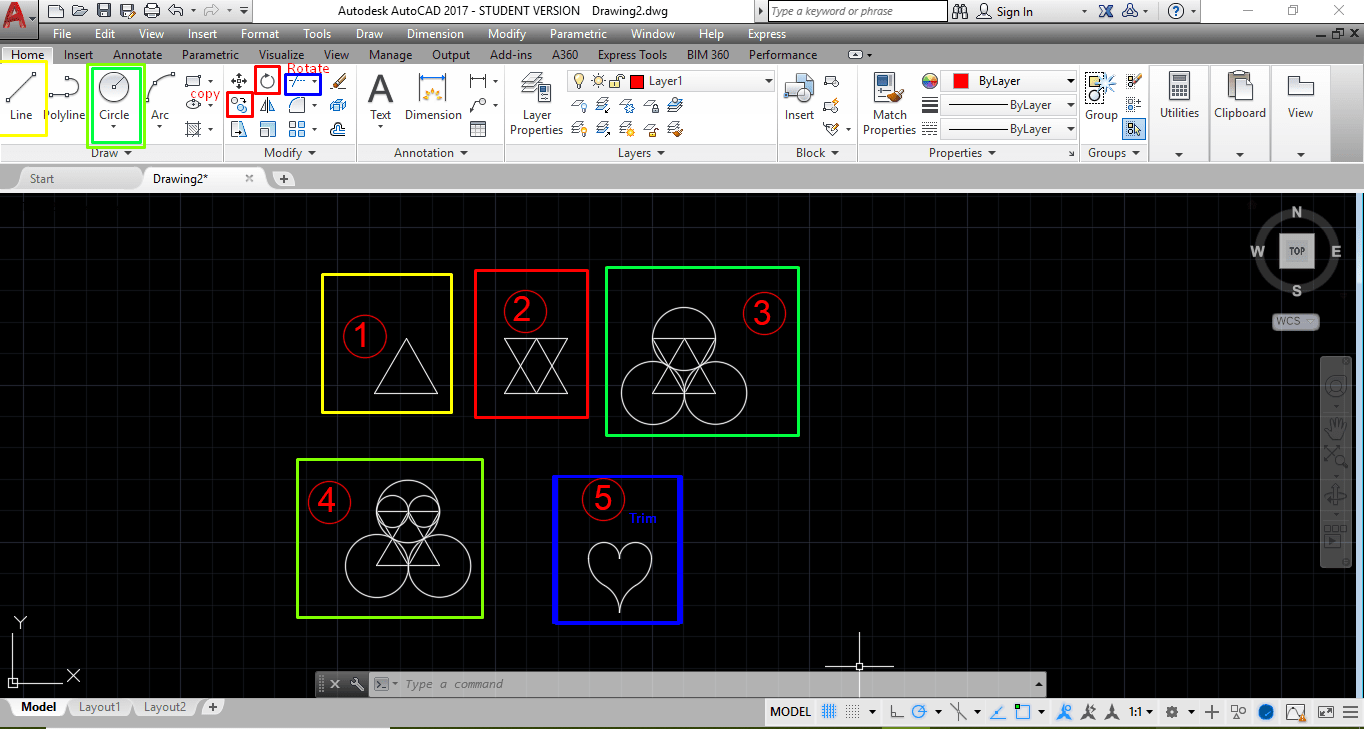
Now, We will learn how to draw a heart using AutoCAD.
- Draw a triangle using lines.
- Copy the triangle and then rotate it 180 degrees.
- Draw three circles on the three vertices of the triangle.
- Draw two circles , each with a radius of the first circle, as shown in the picture.
- Use the trim command to remove the appendages from the shape and get the final shape.
inkscape
For the 2D design, I chose the inkscape software,It is an open source program, and this is the first time that you are associated with this program, so I went to YouTube, watched some lessons, and learned the basics.
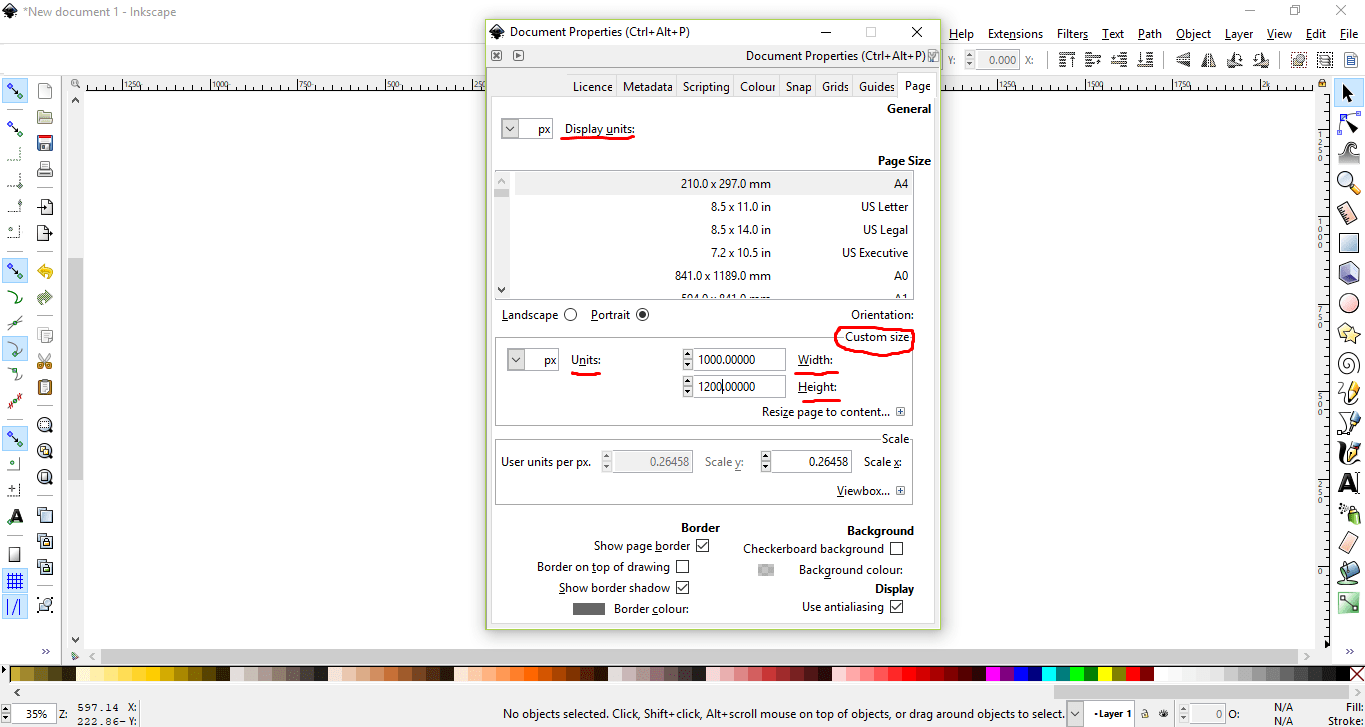
To set the size, go to File Document Properties and define the canva is height and width. Also, in the dialogue box shown in the picture below , change the measurement unit to pixels. For a start, you can set the size to 1000x1200px.
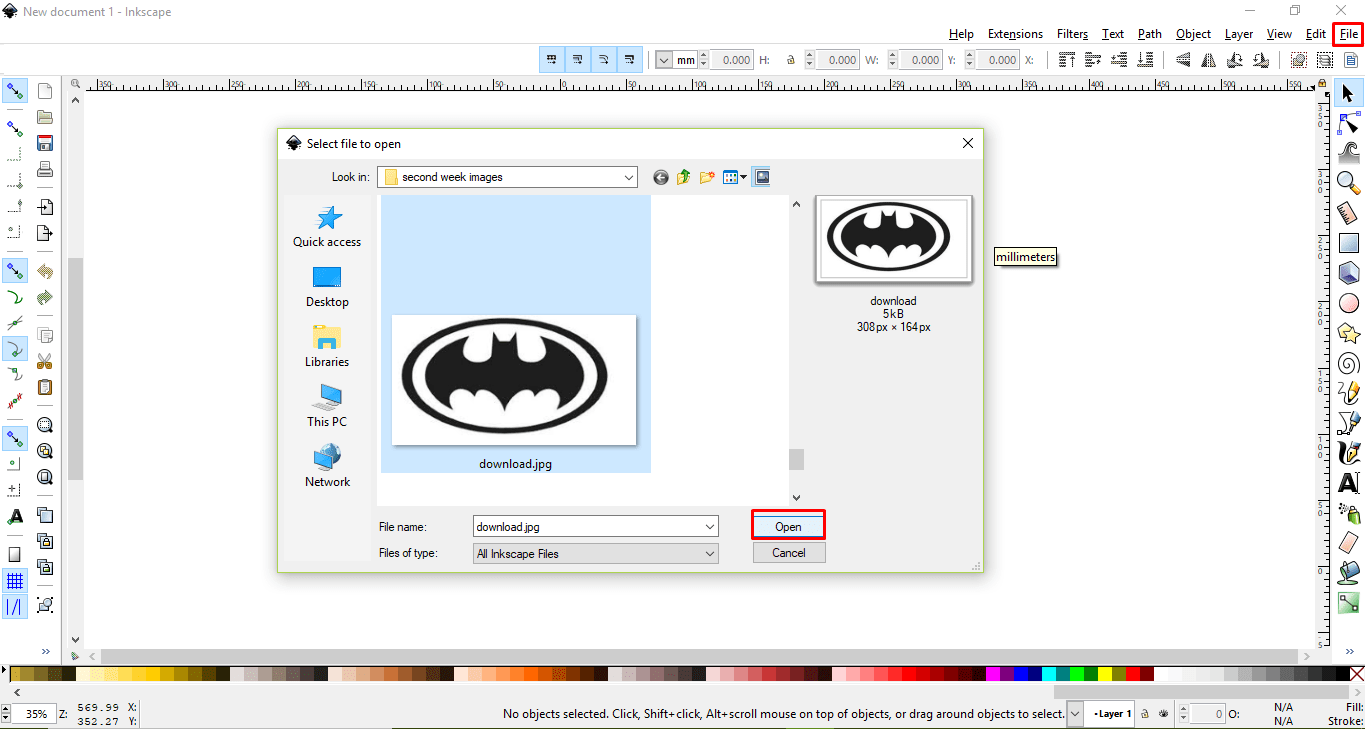
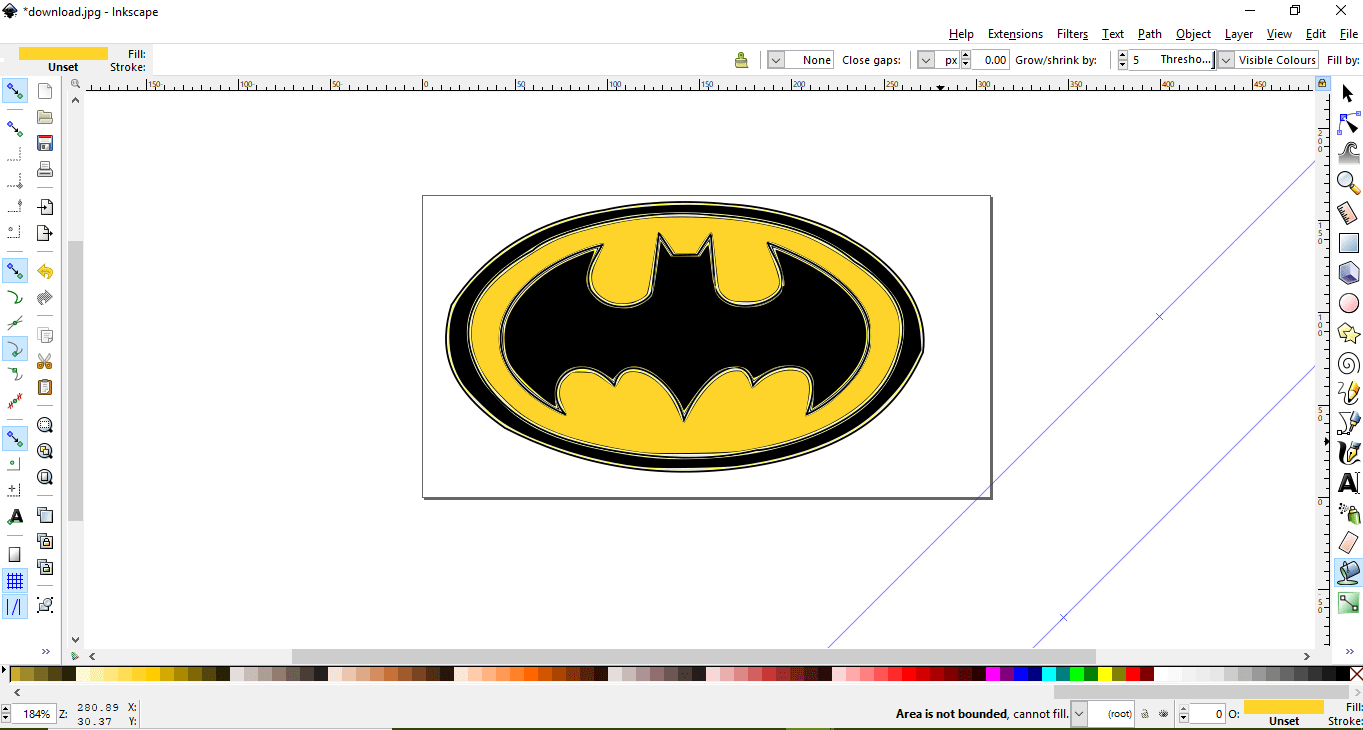
After that I designed the BatMan logo by following steps Choose Choose Logo Image
Upload to work page
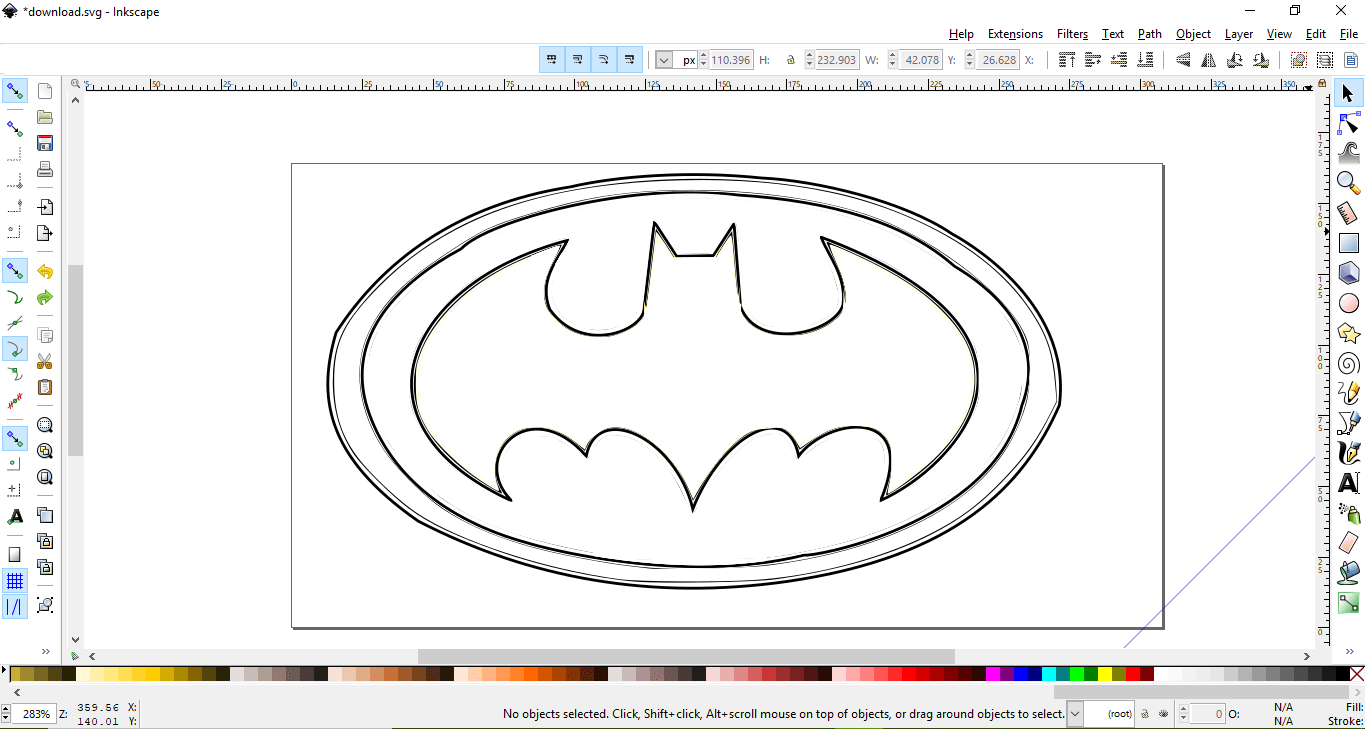
Define the borders of the logo by command drew bezier curves and straight lines
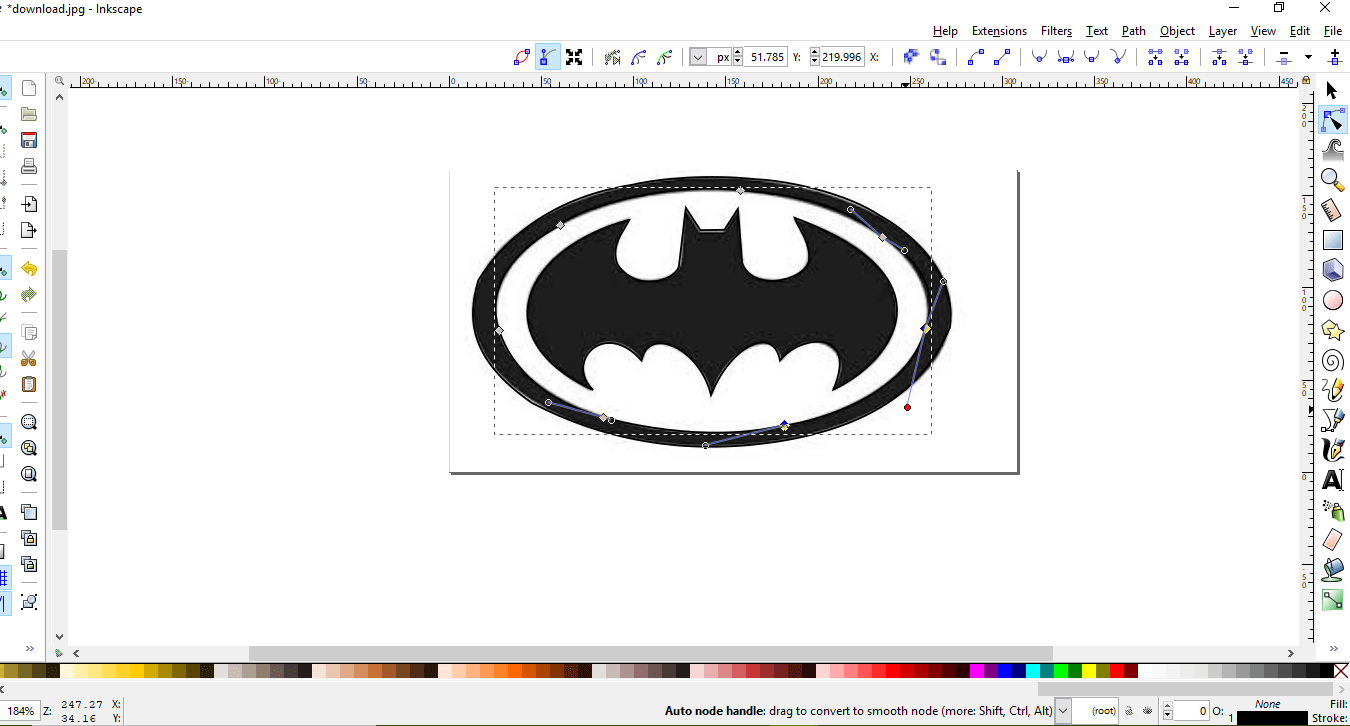
Then remove the logo image To stay the logo image you drew
After that you can modify and give it the colors and The appearance you want. For exampel:
Fusion 360
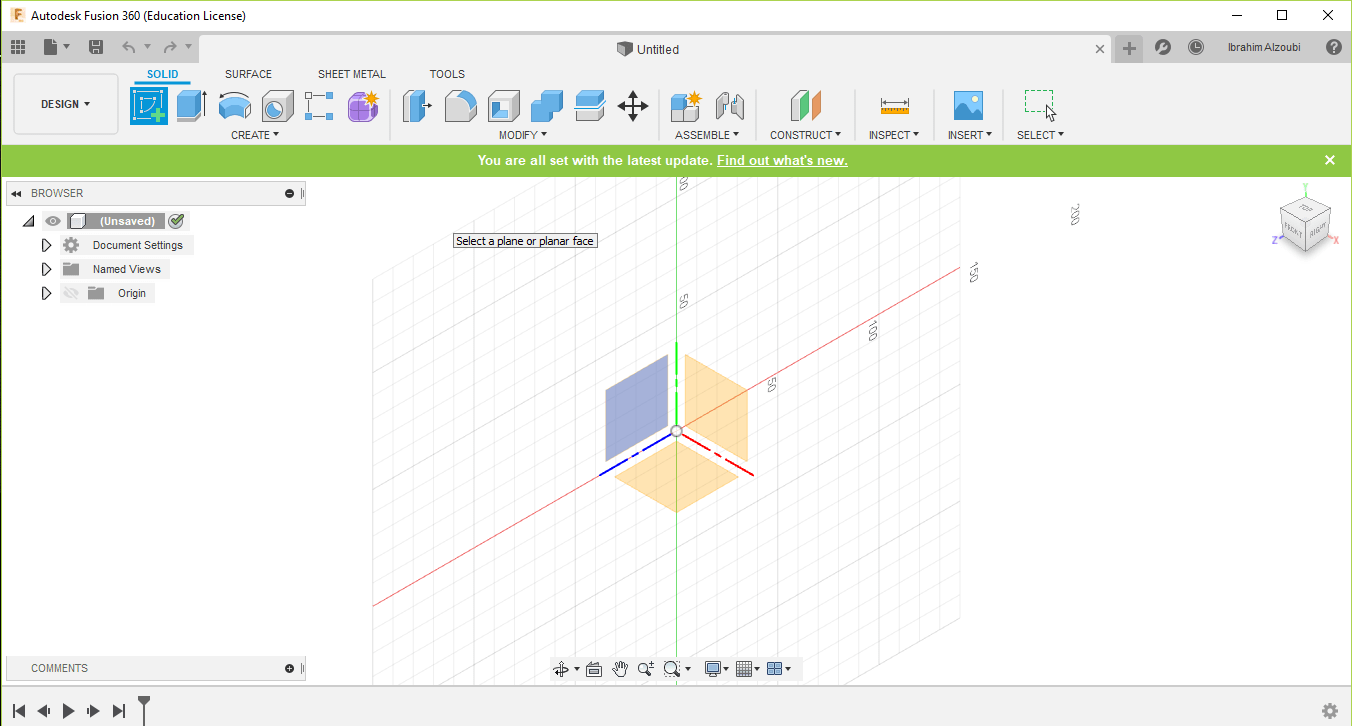
A wonderful program that has very large capabilities and gives you the ability to convert 2D graphics to 3D figures
We start drawing from the drawing menu, we choose any of the shapes ( a circle, a rectangle, an arc line ... anything), then the program asks about the level that you will draw on it after you choose. The screen will return to 2D.
Example I will design a Vase by the following steps
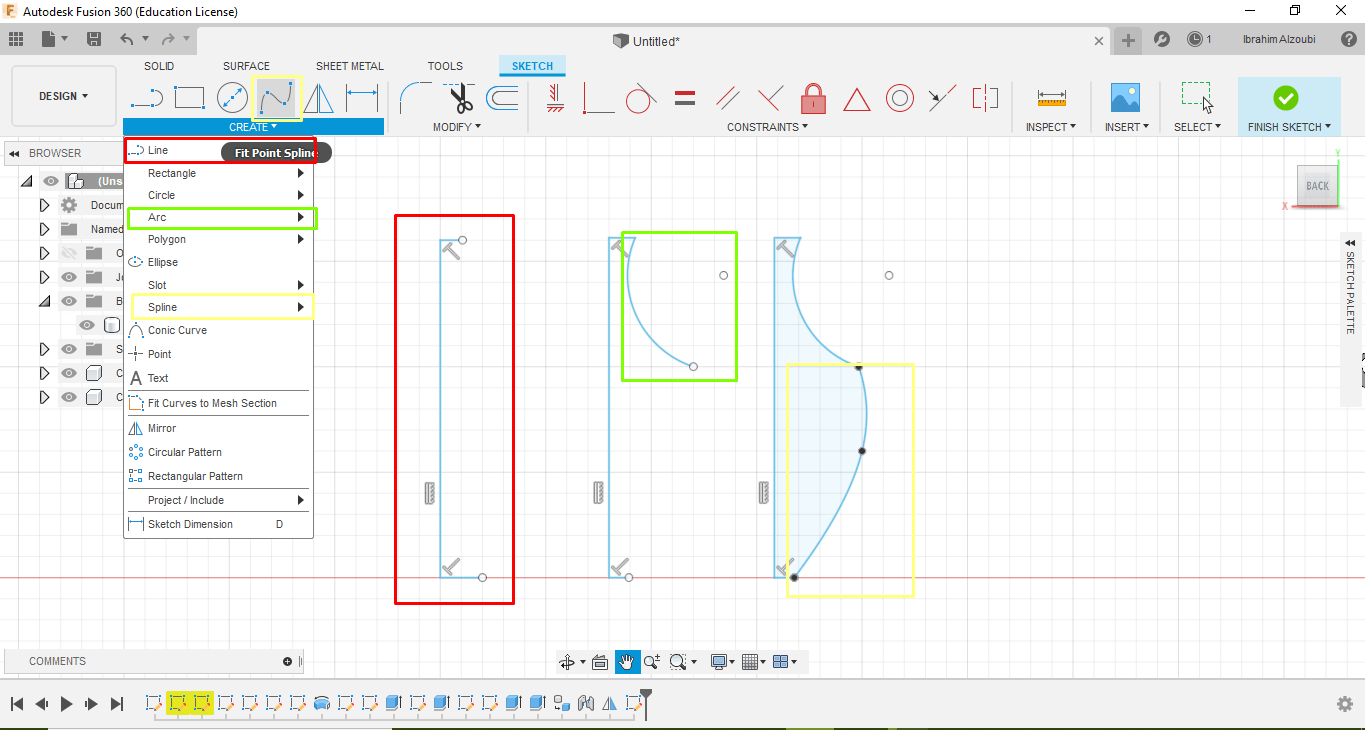
- First we use a line command. We draw a vertical line in addition to two horizontal lines for Form a base and top the vase
- We draw an arc at the top of the line drawing the neck of the vase
- Then draw the body of the vase using Command key
Then using the revolve command, we select Axis, select the object, and specify the type of rotation full

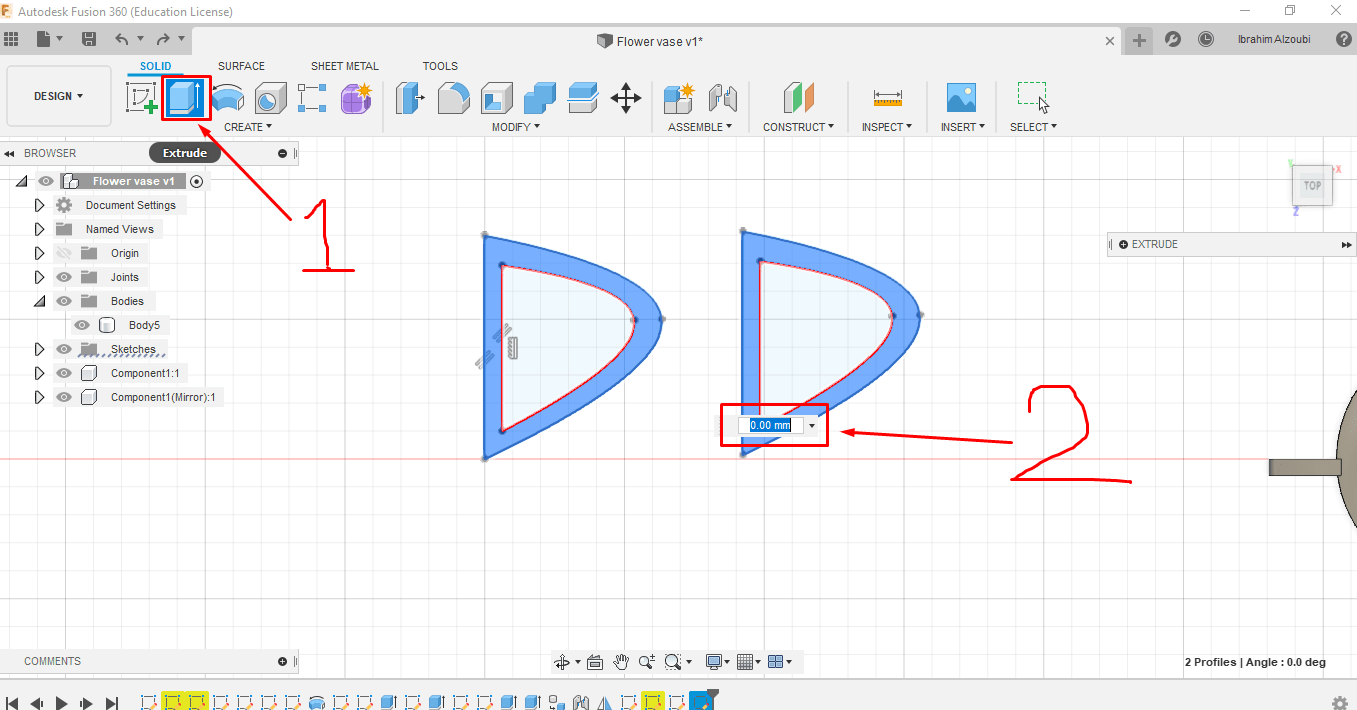
To make a hand for the vase
We draw a line with speline to create a 2D drawing Then To convert the drawing to 3D, click on the drawing with the right mouse button press pull or extrude, then enter the amount of the drawing height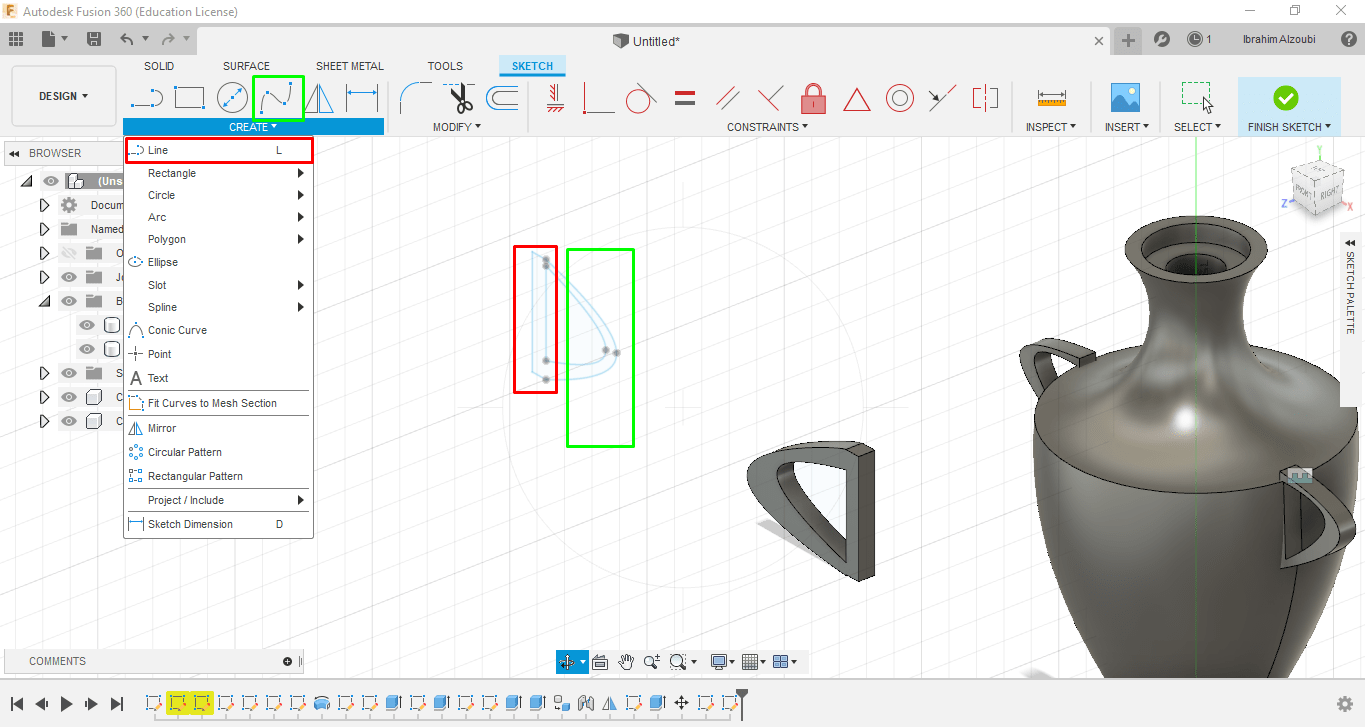
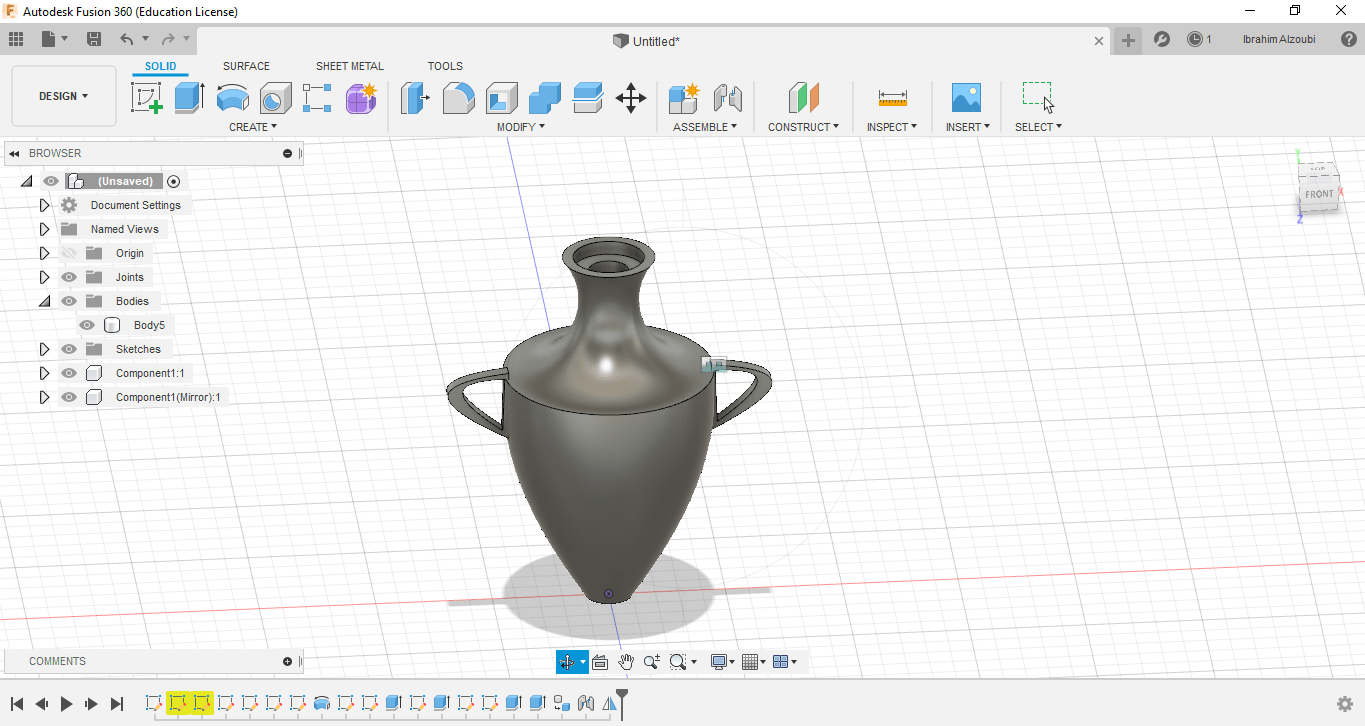
The final shape of the vase
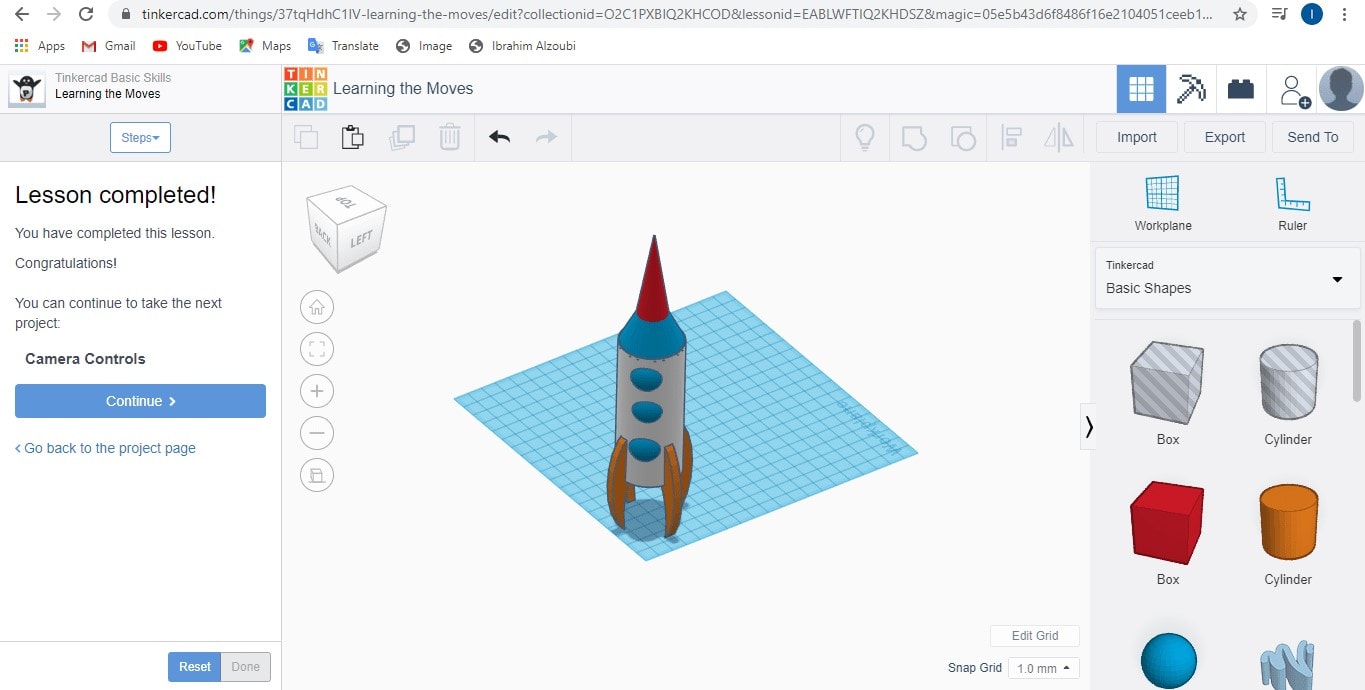
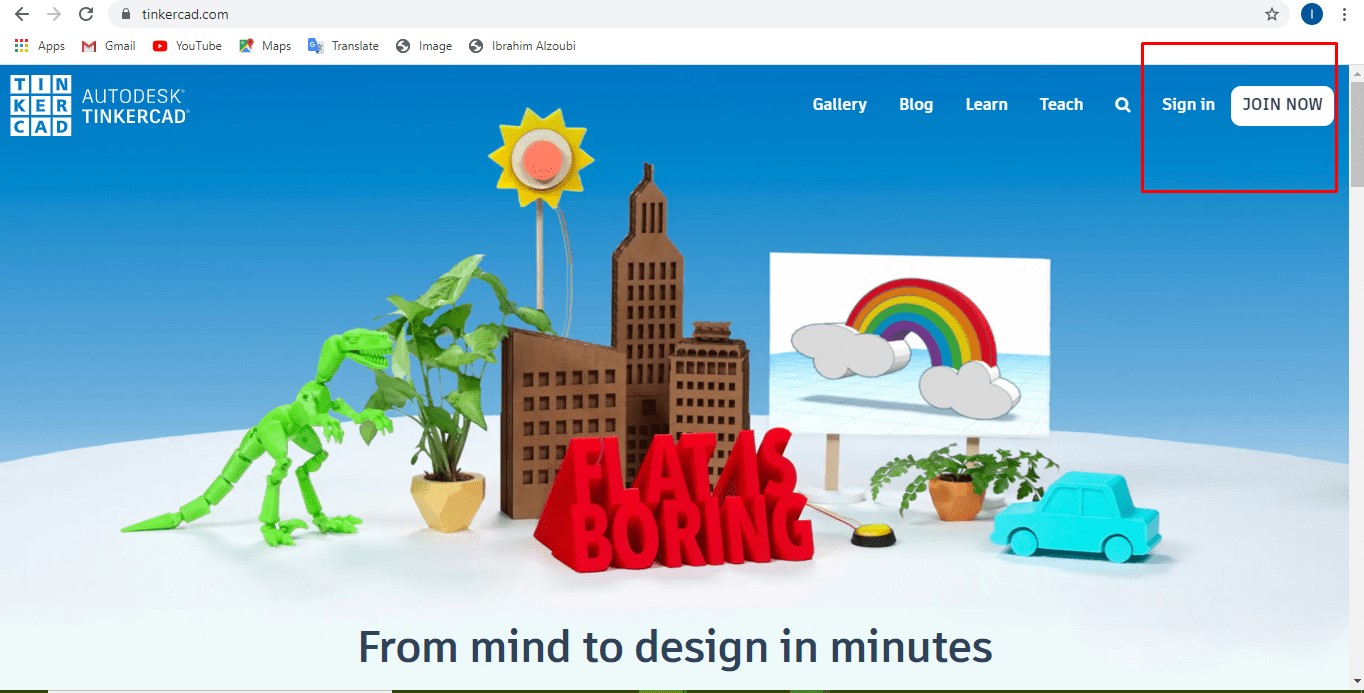
TINKERCAD
Tinkercad is a free, easy-to-use app for 3D design, electronics, and coding. I used this site to design rocket for kids
Log in to the site by e-mail
Insert and modify objects
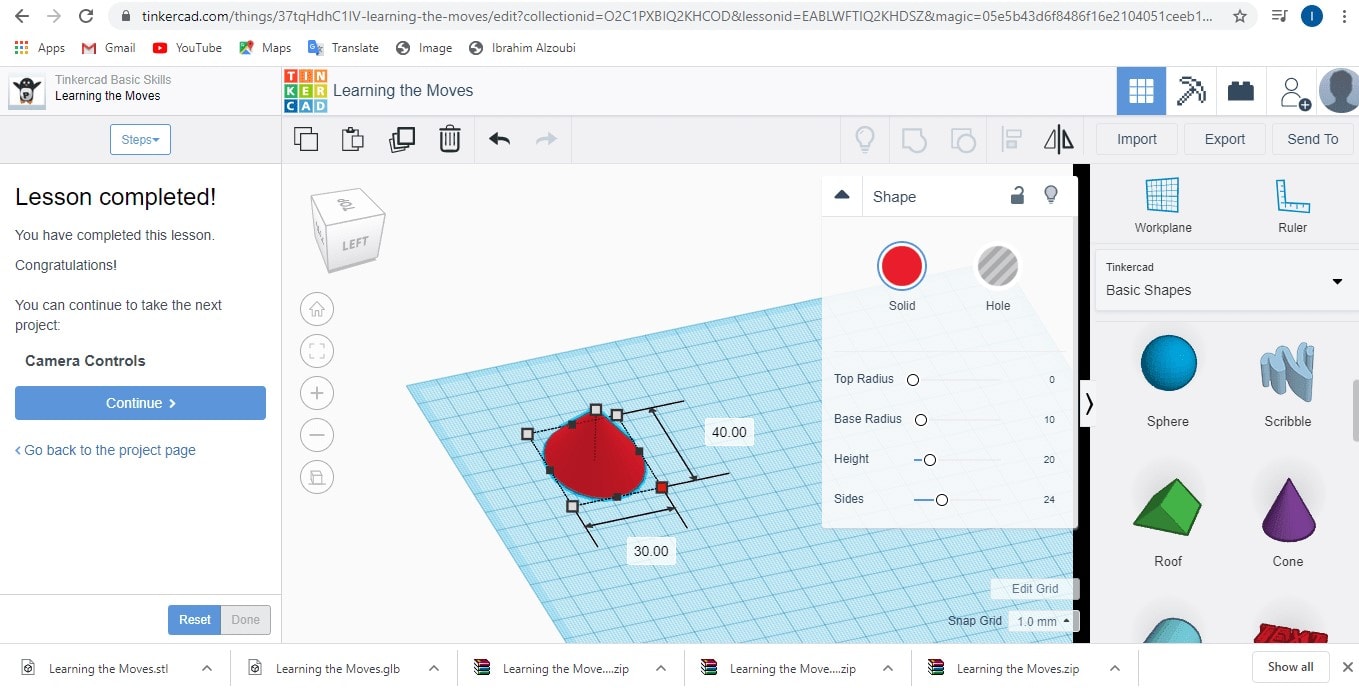
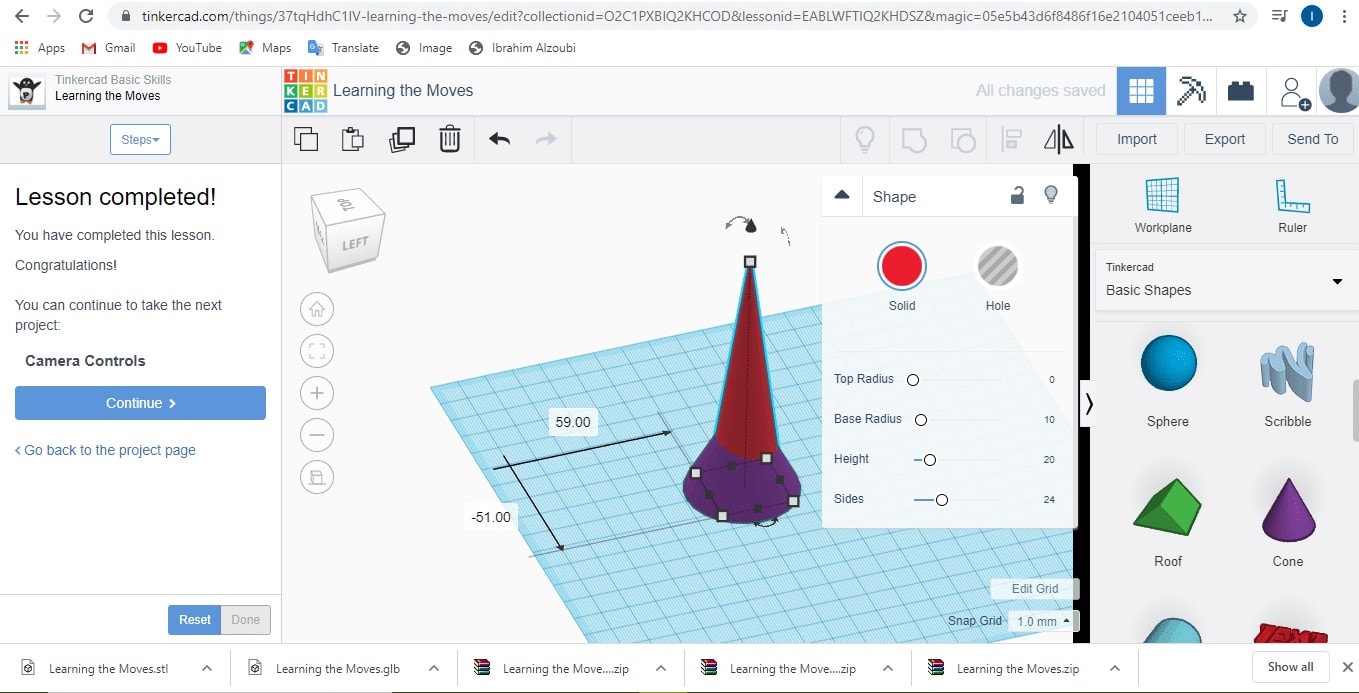
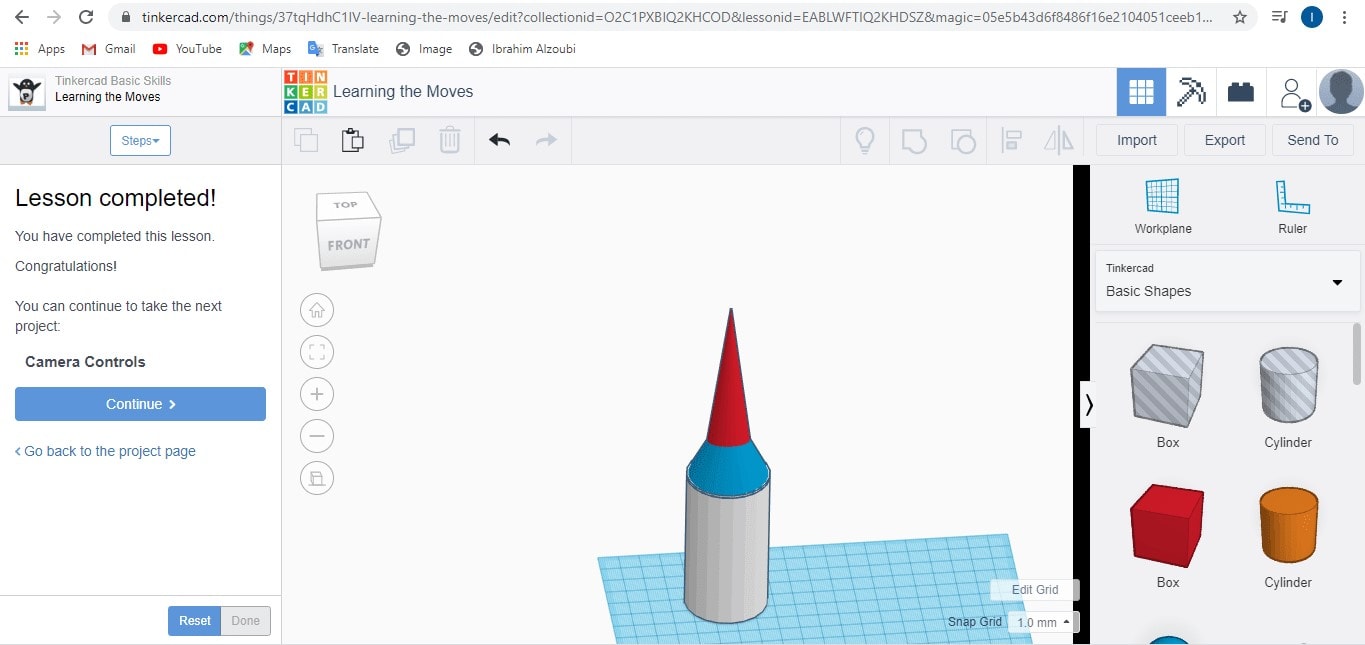
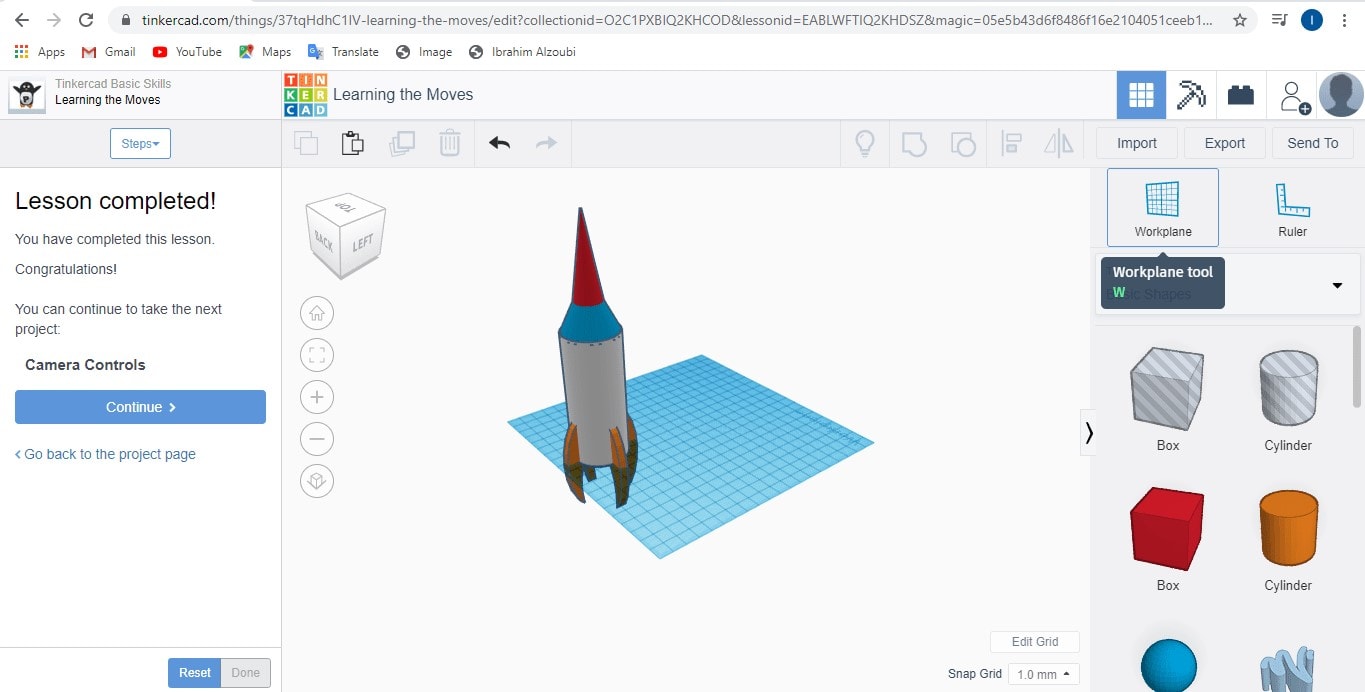
Until you reach the final form